HOME PAGE
WHAT'S NEW?
JUNIOR PAGE
COACHING
WHAT IS
ORIENTEERING?
GALLERY
MAPPED AREAS
EVENTS DIARY
RESULTS
SOLUS
CLUB POLICIES
HOW TO JOIN
LINKS
CONTACT US

THE HEADLESS CHICKEN PAGES
Bearings.
Frequently the mention of taking and using bearings causes mixed feelings in even the most experienced competitor and newcomers to the sport often are convinced that this is a complex and mysterious skill that takes years to understand and perfect. Thinking back to when I started orienteering I was shown how to take bearings in a class room setting and then a few days later, let loose in an event to put theory into practice: in retrospect not the most sensible plan. It is one thing to understand the theory when you are sitting indoors and another trying to remember what you have been told when you are in the middle of a forest, your body and brain are suffering from the effects of exercise and you know that if you get it wrong you will be lost. To add extra pressure the clock is ticking and there are lots of competent looking competitors heading off in a business like manner. Needless to say my first experiments with bearings were not entirely happy. I suspect that many people have similar early experiences. It does take time and practice, but it doesn't have to be regarded as some extraordinary skill. Hopefully this article will help to make the topic a little easier to understand.
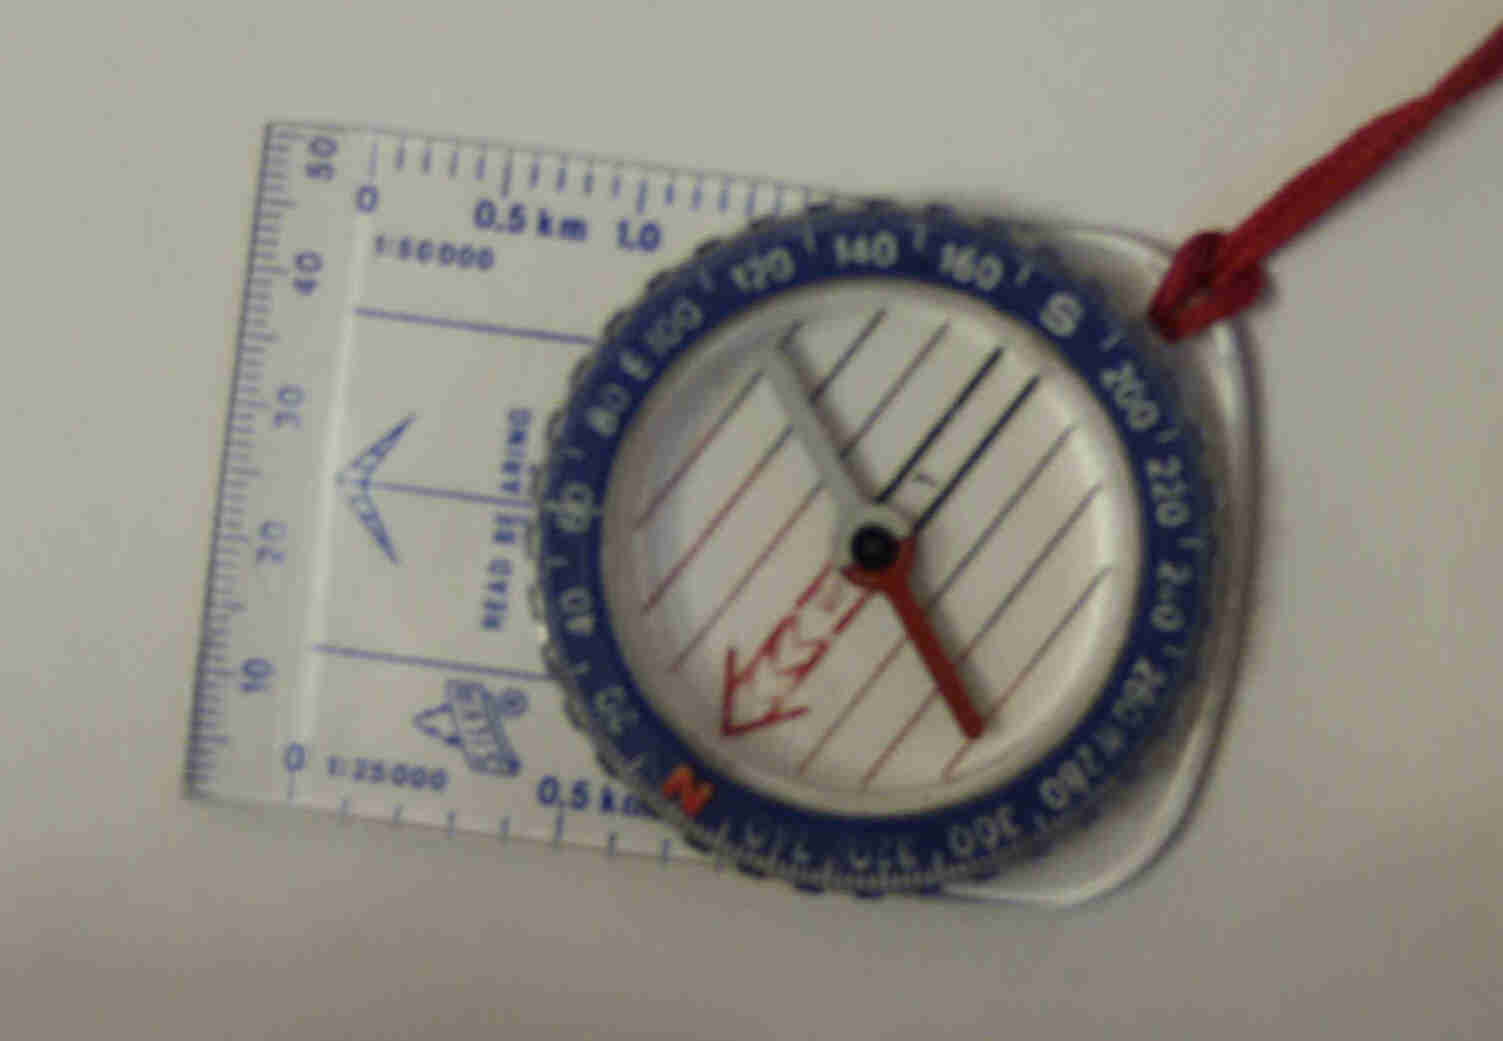
So where to start? Perhaps the best place is with the compass. They come in all shapes and sizes but, when you are learning the easiest to use is one with a reasonable length base plate as shown here. This compass is in a rotating housing, an essential for taking bearings. Notice that there are two sets of lines, the first run the length of the base plate and the second set are on the compass housing. There are usually also arrows on the base plate and on the base of the compass housing. More about these later.
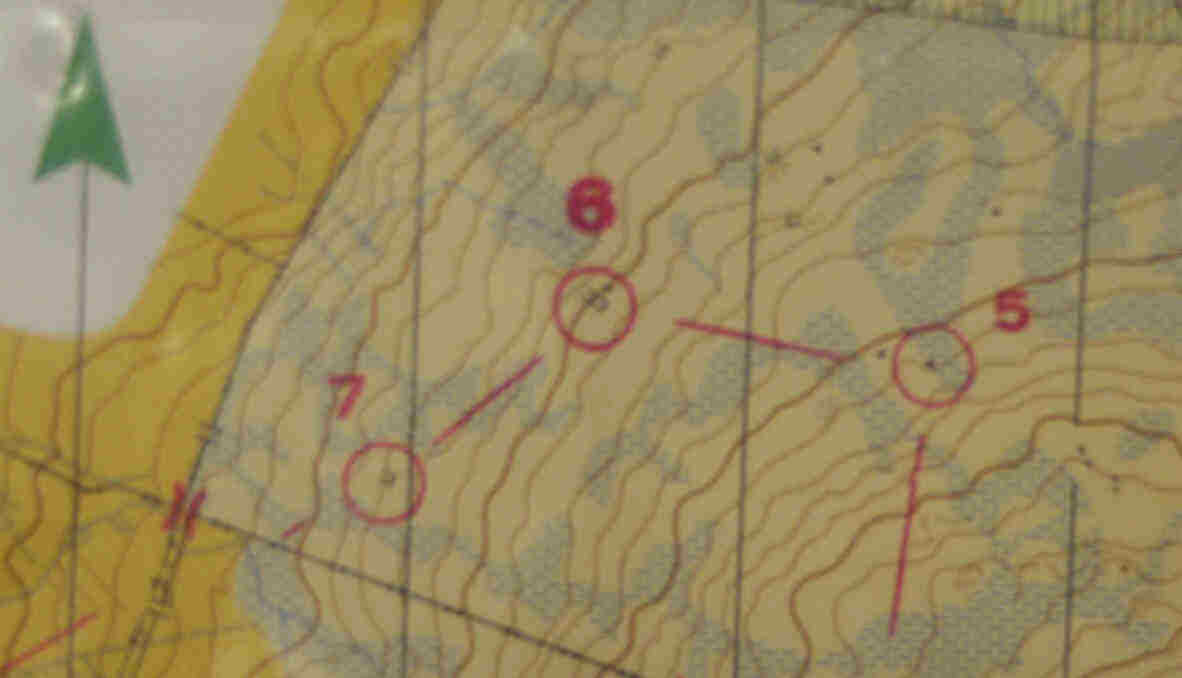
Now find an old orienteering map - you will notice that besides all the information which shows rivers, contours, roads and other features there are black lines running from north to south. These are called northing lines and they help make taking bearings easier. Remember that unless otherwise stated the top of the map is always north. Also all control numbers and writing should be printed in the correct orientation.
@ Crown Copyright. All rights reserved. PU 43423U. BOF Map Registration No. SO-99-269
Step 1.
Take your orienteering map and choose a leg (in this case 5 to 6). Place the edge of the compass along the line which runs between the two controls. Make sure that the arrow on the base plate points in the correct direction i.e. from 5 to 6 and not the other way round. (If you fail to do this you will find yourself heading in the exact opposite direction to the way you want to go).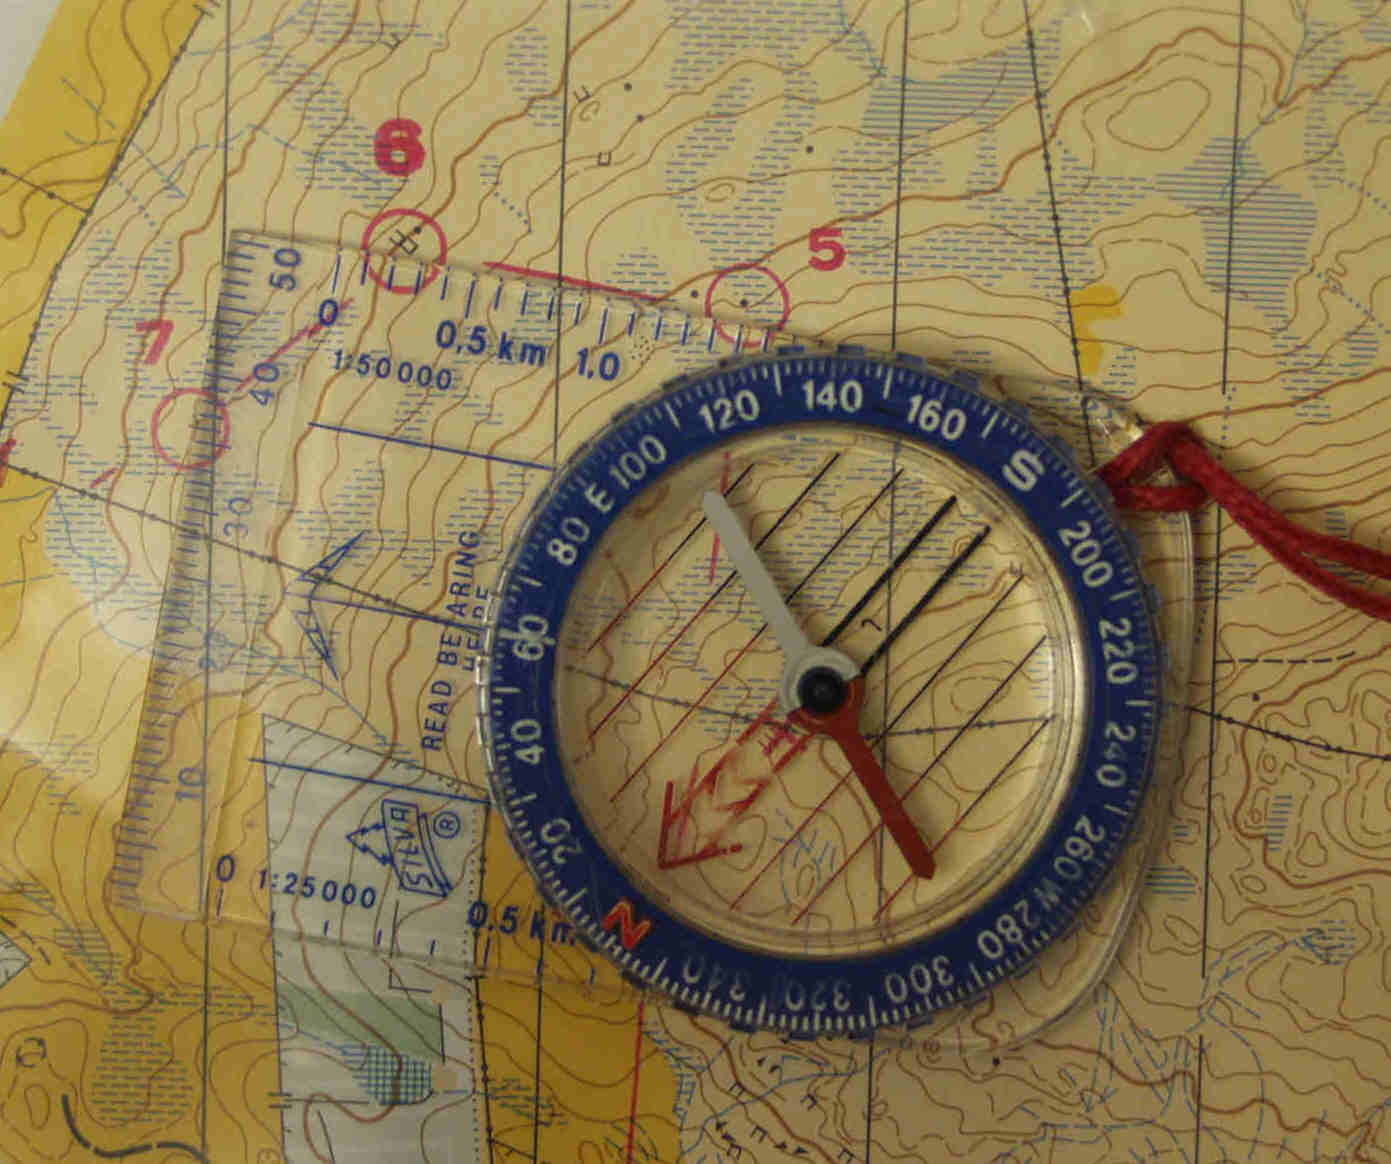
@ Crown Copyright. All rights reserved. PU 43423U. BOF Map Registration No. SO-99-269
Step 2.
Next holding the compass firmly to the map so it doesn't slip, turn the compass housing so that the lines marked on its base line up with the northing lines marked on the map. Make sure that the arrow on the compass housing points to the north of the map, this is usually the top of the map. (again if you get this wrong you will head off in the opposite direction to the one desired.)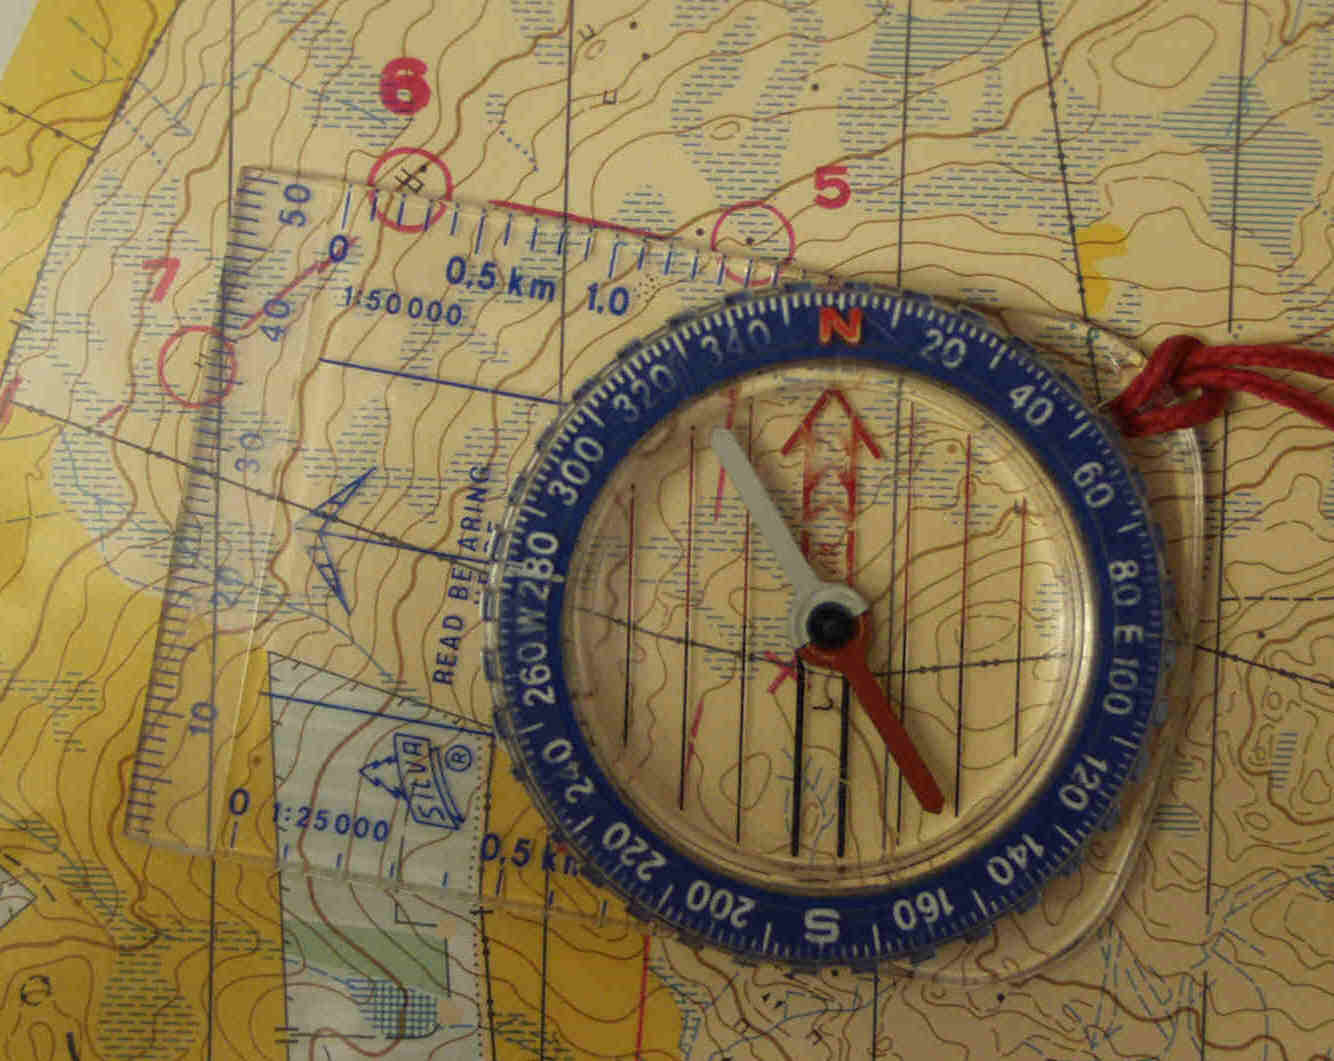
@ Crown Copyright. All rights reserved. PU 43423U. BOF Map Registration No. SO-99-269
Step 3.
Lift the compass away from the map and turn yourself and the compass around until the north end of the swinging needle lines up and points in the same direction as the arrow on the compass housing. You now have a bearing which you can use.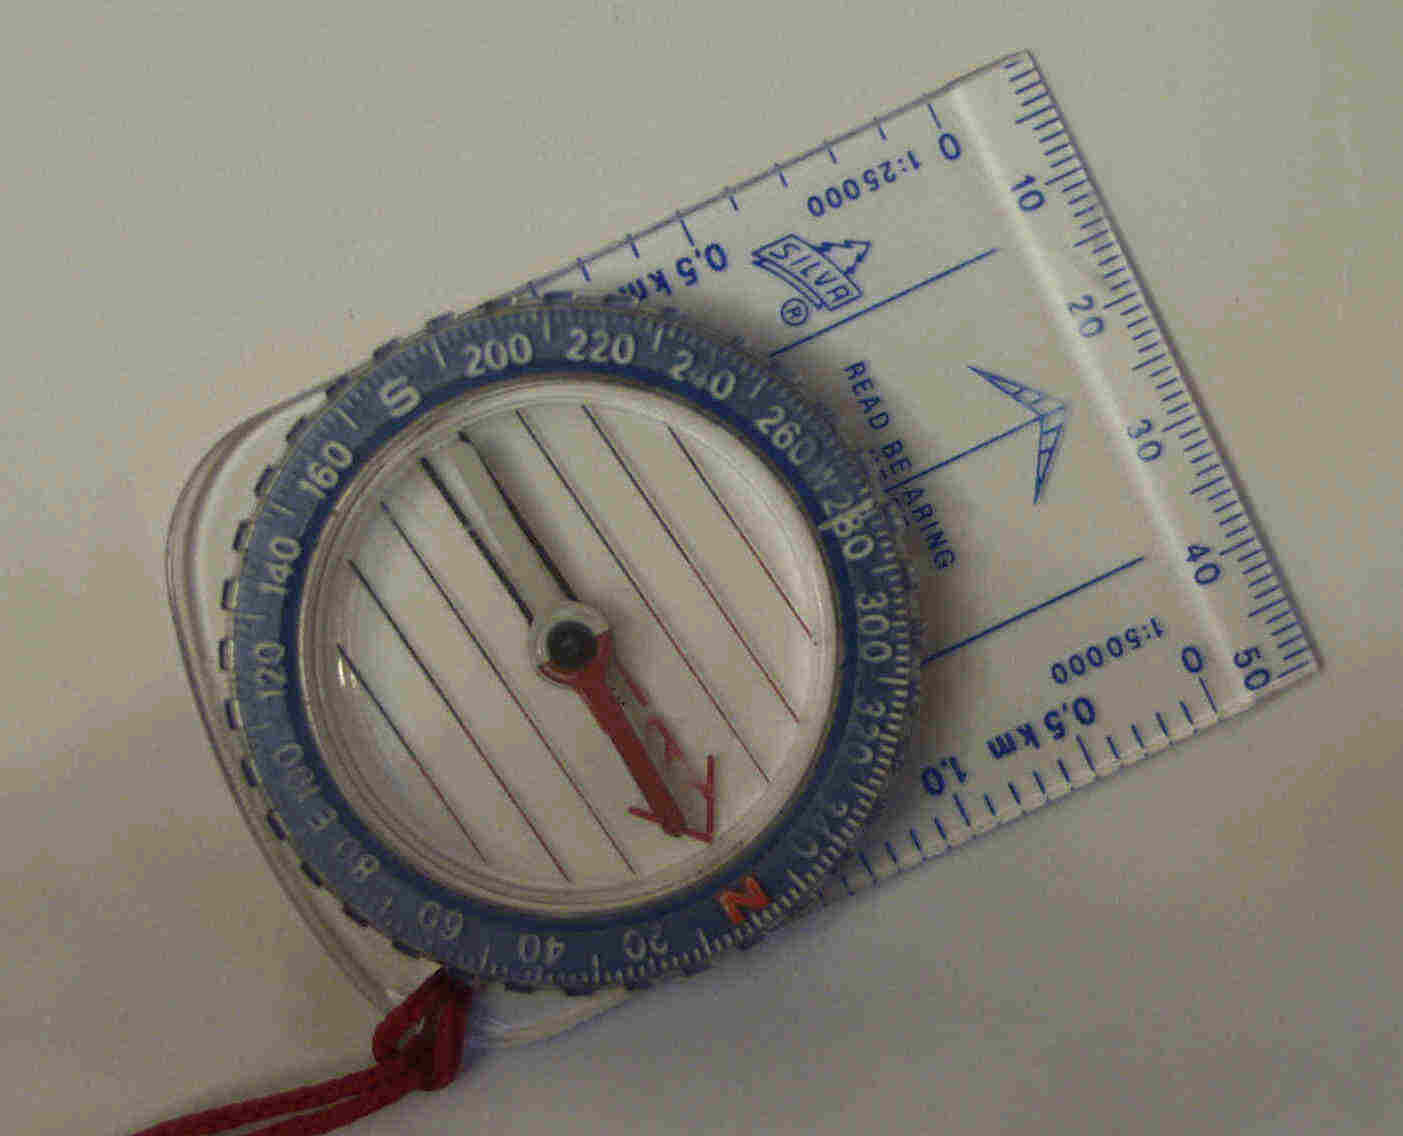
Step 4.
Before setting off make sure that you know how much ground you have to cross so that you can use pacing to ensure that you travel the right distance. Also take note of the features which you will pass on the way. Now you can sight along the compass using the arrow on the base plate until you find some feature which you can use to help you keep on the bearing. Depending on how far you can see ahead you will probably need to use a succession of features. It is a good idea to keep checking with the compass that you are still following the bearing. Remember to count paces as you go and to be aware of the ground you are crossing to help ensure that you stay in touch with the map.Now it is up to you to practise taking bearings until it becomes second nature. Once you can remember the sequence of what to do without looking at the instructions it is time to practise out in the forest. Remember the Saturday local events are ideal for practising using techniques which are unfamiliar.
In a future edition there will be a second article on this subject. This will cover the different ways in which bearings can be used and the limitations of this technique.